As much as we enjoy snacking on raw sugar snap peas, one can only eat so many. This dish caught my eye as a potentially interesting snap pea vehicle. It uses fresh peas as the base for a summery pesto.
I didn't make many changes, other than declining the recipe's suggestion to push the pesto through a mesh strainer. The dish seemed little harmed by my laziness.
'Twas even better cold.
Recipe below; printer-friendly version here.
Monday, July 12, 2010
Sugar Snap Peas & Pasta
Thursday, July 8, 2010
Beans of Awesomeness (with Greens)
I recently found Super Natural Cooking by Heidi Swanson at our local library and spent an evening curled up with it on the couch. It's filled with luscious images that make you want to spend the day cooking (and eating). But as soon as I spotted this simple side dish using chard, I knew which recipe I would be trying first.
The official name is Giant Crusty and Creamy White Beans with Greens. I've affectionately renamed them the Beans of Awesomeness. Because that is exactly what they are.
I wish I were a better food photographer, so I could capture how delicious this dish is. The beans have a textured, almost crunchy outside with soft centers; the flavor of the greens quietly blends in among the garlic and olive oil. What's more, it uses simple, easy to find ingredients.
The author cautions against using canned beans, which apparently don't hold up well to sautéing. So sometime the day of or in the few days before, you'll want to cook up one-half pound of large dried white beans (notes on how to cook dried beans). I failed to think about the beans the night before, but got away with soaking them for five hours and cooking for one. I added a shallot to the stock pot just to make things a little more interesting.
From there, it all happens in a single skillet. Fair warning: you need a large skillet.
The cookbook suggested serving the beans "over grilled slices of rustic bread rubbed with a clove of garlic and a fragrant extra-virgin olive oil." A homely bruschetta, if you will.
At this point in the meal, conversation stopped. Because we were too busy scarfing down tasty bean-topped bread.
The Husband declared he would happily serve the Beans of Awesomeness to guests. I heartily agreed. And in our house, that's about the highest compliment a dish can get.
The official name is Giant Crusty and Creamy White Beans with Greens. I've affectionately renamed them the Beans of Awesomeness. Because that is exactly what they are.
I wish I were a better food photographer, so I could capture how delicious this dish is. The beans have a textured, almost crunchy outside with soft centers; the flavor of the greens quietly blends in among the garlic and olive oil. What's more, it uses simple, easy to find ingredients.
The author cautions against using canned beans, which apparently don't hold up well to sautéing. So sometime the day of or in the few days before, you'll want to cook up one-half pound of large dried white beans (notes on how to cook dried beans). I failed to think about the beans the night before, but got away with soaking them for five hours and cooking for one. I added a shallot to the stock pot just to make things a little more interesting.
From there, it all happens in a single skillet. Fair warning: you need a large skillet.
|
| ||||
|
|
At this point in the meal, conversation stopped. Because we were too busy scarfing down tasty bean-topped bread.
The Husband declared he would happily serve the Beans of Awesomeness to guests. I heartily agreed. And in our house, that's about the highest compliment a dish can get.
Tuesday, July 6, 2010
Baked Egg Rolls
I was scheming up ways to use up the other half of the Napa cabbage, when I thought of egg rolls. One my my favorite appetizers! I haven't the foggiest idea how to deep fat fry (nor the inclination to learn), so I hunted down a baked egg roll recipe to try.
Begin by pulsing celery and carrots in a food processor until finely chopped. Mix in shredded cabbage and throw into the microwave to steam. (The recipe suggested covering the mixture with plastic wrap, but the thought of microwaving plastic was a little worrisome to me, so I put an upside down bowl on top instead. It seemed to work just fine.) While the cabbage mixture is steaming, begin sautéing onions, ginger and garlic in a large skillet. I doubled the amount of ginger and garlic, because the original struck me as a little conservative on those flavors.
Add ground turkey (or pork) and continue cooking. When the meat is cooked through, add the cabbage mixture and stir in soy sauce and ground pepper. Chill briefly.
Time to roll! The original recipe gave tedious rolling instructions that involved cutting off the two side corners. Who has the patience for that sort of detail on an egg roll? I did a couple the recipe's way, but didn't see any advantage to it, so I switched to a different method: add filling to the bottom quadrant, fold bottom corner towards center, fold side corners toward center, roll up toward the top corner and seal with a brushing of egg white.
And you have one small egg roll.
Lay the rolls seam side down on a greased baking sheet, brush with oil and bake until golden brown. Serve warm with your favorite dipping sauce.
I measured out the three tablespoons of filling per wrapper just as the recipe called for and ended up with eight rolls, a far cry from the fourteen it claimed to make. They were delicious, although they definitely tasted like egg rolls made with ground turkey instead of the more common chicken or pork--a touch of the healthy vibe, if you know what I mean.
I froze a set of uncooked egg rolls as an experiment. If they freeze well, this could be a great way to preserve cabbage--especially since baking in the summer isn't always the most attractive option. When I try baking them, I'll let you know how it goes!
Recipe below or printable version here.
| Sorry about the blurry pictures! |
Begin by pulsing celery and carrots in a food processor until finely chopped. Mix in shredded cabbage and throw into the microwave to steam. (The recipe suggested covering the mixture with plastic wrap, but the thought of microwaving plastic was a little worrisome to me, so I put an upside down bowl on top instead. It seemed to work just fine.) While the cabbage mixture is steaming, begin sautéing onions, ginger and garlic in a large skillet. I doubled the amount of ginger and garlic, because the original struck me as a little conservative on those flavors.
Add ground turkey (or pork) and continue cooking. When the meat is cooked through, add the cabbage mixture and stir in soy sauce and ground pepper. Chill briefly.
Time to roll! The original recipe gave tedious rolling instructions that involved cutting off the two side corners. Who has the patience for that sort of detail on an egg roll? I did a couple the recipe's way, but didn't see any advantage to it, so I switched to a different method: add filling to the bottom quadrant, fold bottom corner towards center, fold side corners toward center, roll up toward the top corner and seal with a brushing of egg white.
And you have one small egg roll.
Lay the rolls seam side down on a greased baking sheet, brush with oil and bake until golden brown. Serve warm with your favorite dipping sauce.
I measured out the three tablespoons of filling per wrapper just as the recipe called for and ended up with eight rolls, a far cry from the fourteen it claimed to make. They were delicious, although they definitely tasted like egg rolls made with ground turkey instead of the more common chicken or pork--a touch of the healthy vibe, if you know what I mean.
I froze a set of uncooked egg rolls as an experiment. If they freeze well, this could be a great way to preserve cabbage--especially since baking in the summer isn't always the most attractive option. When I try baking them, I'll let you know how it goes!
Recipe below or printable version here.
Friday, July 2, 2010
Freezing strawberries
Freezing berries tends to remind me of making a deposit: banking the vibrant sweetness of summer against the gloom of winter.
Flash freezing is my go-to method of preserving berries. It involves little more than cookie sheets and some ziploc bags. Easy peasy. I left this batch of strawberries whole, to use in smoothies. Partially thawed, they also are a nice touch on cakes or in fruit salads. Just don't let them thaw all the way or they can get smushy.
- When freezing whole strawberries, choose the nicest looking, firmest ones
- Gently wash, draining well
- Remove the hulls
- Place on a cookie sheet, making sure no berries are touching
- Freeze for a few hours (or overnight), until frozen solid like so many strawberry marbles
- Move into a freezer container or plastic freezer bag, removing as much of the air as possible to prevent freezer burn
Now wait until the weather turns cold and enjoy the reminder of summer!
Thursday, July 1, 2010
Pasta With Beans and Greens
I had never tried pairing pasta with beans as a main dish until earlier this year. (Pasta e fagioli, if you're feeling fancy.) But when I saw a few versions while cookbook browsing, I was intrigued.
Together, the grains and beans are a complete protein source, making it a tidy meatless meal.
It's a simple two-pot dish. In one pot, cook up some chunky pasta, some shape that can hold its own against the beans. We picked orecchiette, which looks like adorable wee turtle shells. The name actually means "small ear," but the thought of a bowl full of ears squigs me out. I'm sticking with turtle shells.
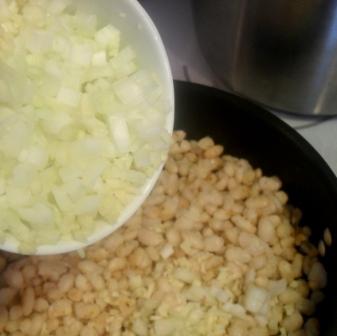
Meanwhile, get some garlic and onions going in a skillet.
Add chopped greens and cook, covered, for a few minutes. Add beans and basil and cook for a few minutes more.
Toss with the pasta and squeeze a lemon over it all to counter the bitterness of the greens. Although the recipe didn't call for it, we added a little grated Parmesan.
The kids were smitten with the orecchiette. "It's helmets, Mama! Little construction helmets! Like Bob the Builder," said The Boy. "Hats!" cried The Girl. But they diligently picked over every single bean and bit of kale on their plates, so it was kind of a failure in that regard. The new score: me: 1; kale: 1.
The Husband and I gave it a B. Although I liked the touch of lemon in this recipe, we have a version that uses tomatoes that I like better. But it was worth a try.
Recipe below; printable version here.
Together, the grains and beans are a complete protein source, making it a tidy meatless meal.
It's a simple two-pot dish. In one pot, cook up some chunky pasta, some shape that can hold its own against the beans. We picked orecchiette, which looks like adorable wee turtle shells. The name actually means "small ear," but the thought of a bowl full of ears squigs me out. I'm sticking with turtle shells.
Meanwhile, get some garlic and onions going in a skillet.
Add chopped greens and cook, covered, for a few minutes. Add beans and basil and cook for a few minutes more.
Toss with the pasta and squeeze a lemon over it all to counter the bitterness of the greens. Although the recipe didn't call for it, we added a little grated Parmesan.
The kids were smitten with the orecchiette. "It's helmets, Mama! Little construction helmets! Like Bob the Builder," said The Boy. "Hats!" cried The Girl. But they diligently picked over every single bean and bit of kale on their plates, so it was kind of a failure in that regard. The new score: me: 1; kale: 1.
The Husband and I gave it a B. Although I liked the touch of lemon in this recipe, we have a version that uses tomatoes that I like better. But it was worth a try.
Recipe below; printable version here.
Labels:
Beans,
Dairy Free,
Greens,
Main Dishes,
Recipes,
Vegetarian
Subscribe to:
Posts (Atom)